
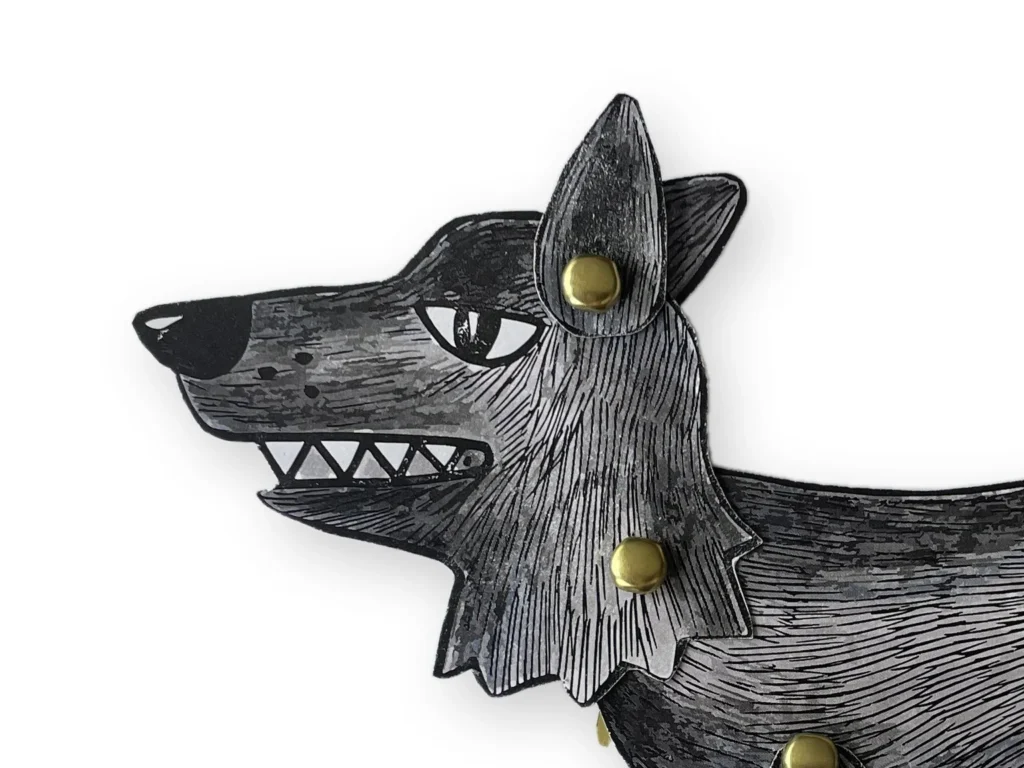
Good paper doll joints turn smoothly, hold a pose and do not show their metal on the back. These are the tips and tricks we use for all our articulated paper dolls, from the cats to the Big Bad Wolf. Most of them came from building the wolf on our table with a camera running, so the photos show real joints, not drawings.
Before you punch
1. Print on card
Use white card of about 160 to 250 g/m² (60 to 90 lb cover). Plain printer paper is fine for a quick test, but the joints wear out faster. Check the heaviest paper your printer takes before you print.
2. Colour first, cut second
If you print a line-art version, colour the pieces while they are still on the sheet. Try your markers or paint on a corner first and let it dry before you cut.
3. Rough-cut, then trim
Cut each piece loosely out of the sheet, then trim it along the outline. A small piece is much easier to turn in your hand than the whole sheet, especially around paws, ears and fur.
4. Lay the doll out before you make any holes
Put all the pieces on the table in the shape of the finished doll. You see which piece goes on top and which holes belong together. The assembly guide in each PDF shows the layer order.
Holes and brads
5. Match the hole to the brad
There is no single right hole size, it depends on the tip of your brad. The hole should be just big enough for the prongs to pass through. Make one test hole in a scrap of the same card. If the brad slips through easily and the joint wobbles, the hole is too big.
6. A punch makes cleaner holes than an awl
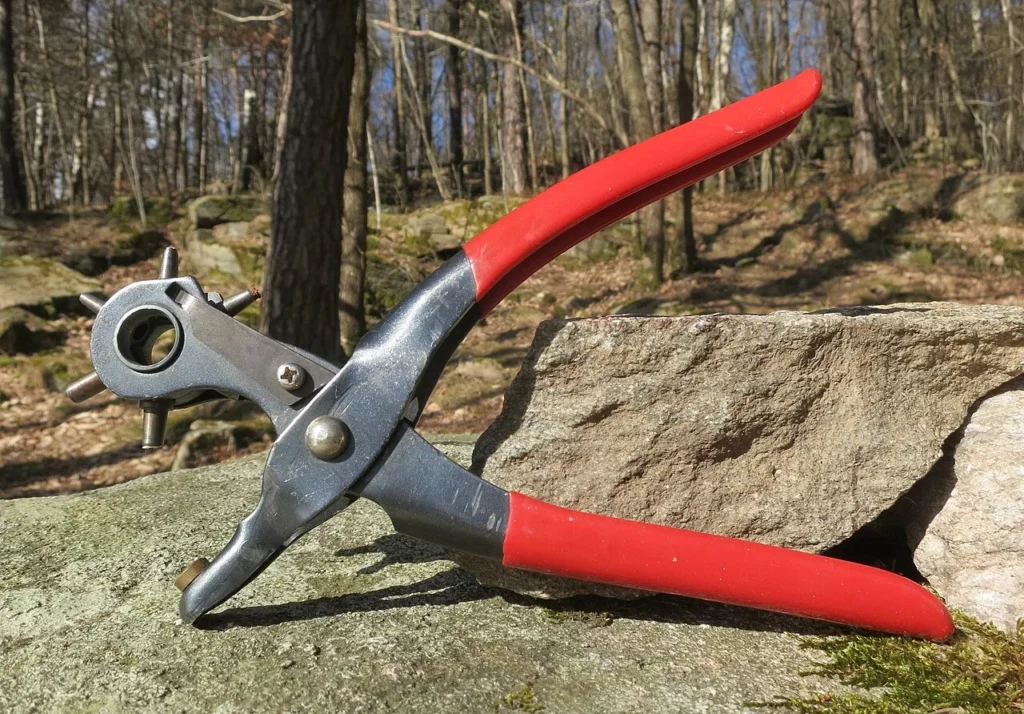
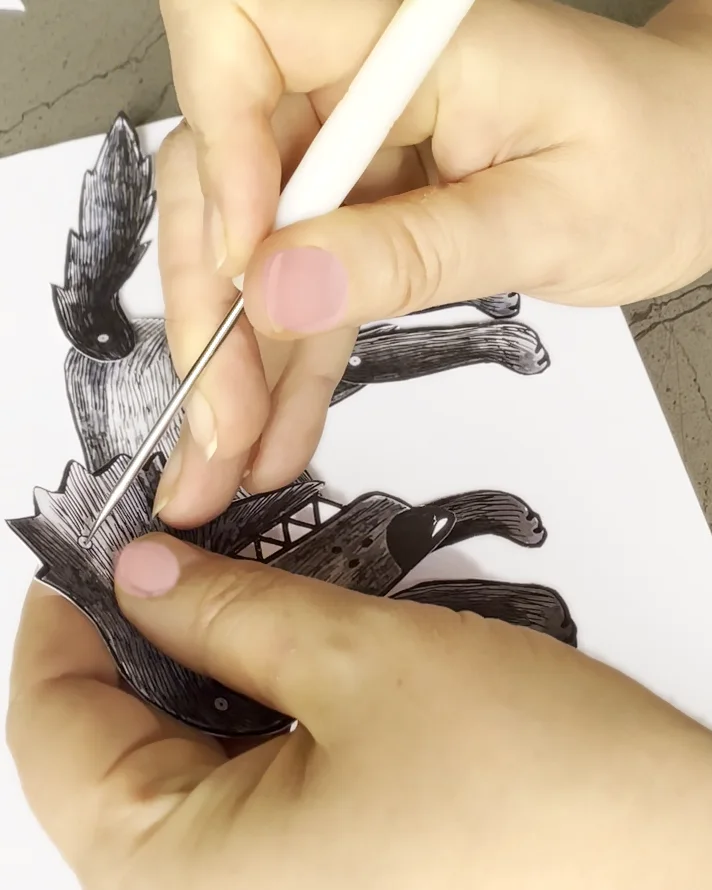
An awl works, and it is what we used for the wolf in the photos. For round, clean holes, look at punches sold for leather and rivets. A rotary leather punch has several tubes on one wheel, and a Japanese screw punch takes interchangeable bits, so you can choose the size that fits your brads.
7. Pick small brads
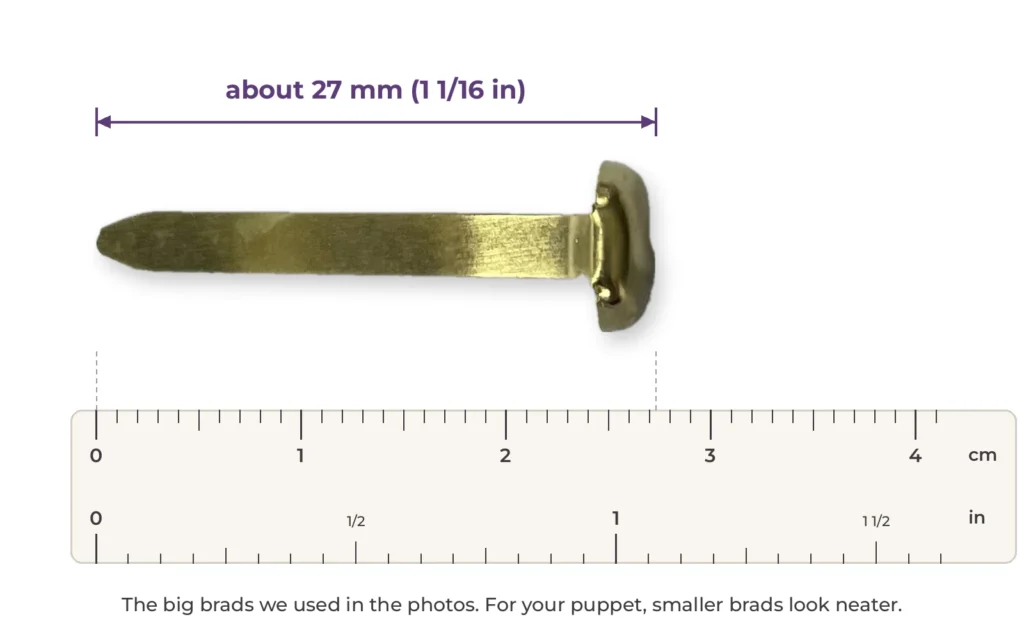
The brads in our wolf photos are big on purpose, so every joint shows up on camera. On a finished doll, big brads look heavy and are harder to hide. Smaller brads look neater and need smaller holes. Brads are also sold as split pins or paper fasteners.
Making the joint
8. Squeeze the prongs with scissors
A small trick from our own build. Before you push a brad in, put its prongs between the scissor blades, close to the pivot, and squeeze them right next to the brad head. The prongs then spread wider on the back and the brad sits flat against the card.
9. Open the prongs along the limb
On the back, open the prongs along the leg or arm, not across it. That way they stay hidden behind the doll and do not poke out past the edge. Brad prongs are usually two slightly different lengths, which makes them easier to separate.
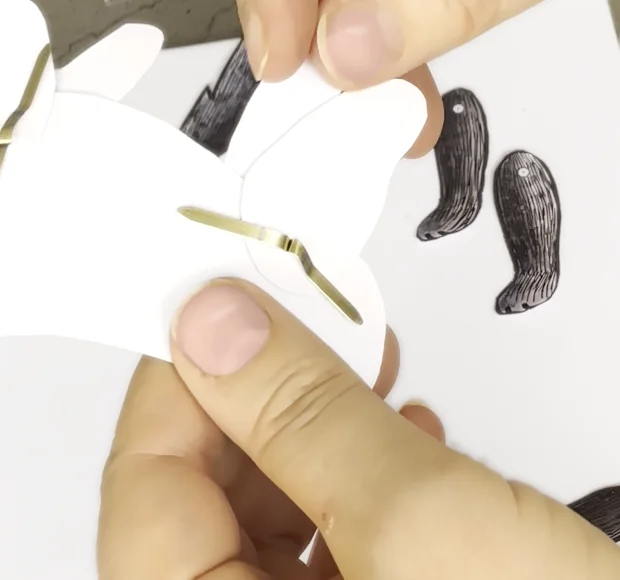
10. Keep the joints a little loose
Do not press the brads too tight. Each joint should still turn easily after the prongs are open.
11. Two pieces on one brad
Some joints hold more than two layers. On our wolf, both ears share one brad on the head, and both front thighs share one brad on the body. Stack the pieces in the order shown in the guide before you push the brad through.
After it is made
12. Let children colour and play, adults punch
Children can colour, cut the big pieces and pose the doll. Making the holes and setting the brads is a job for an adult: awls are sharp and brads are small parts.
13. Lost a piece? Print it again
Our paper doll files stay in your DiNerija account under My account, Downloads, with no download limit, so a lost leg or a bent ear is easy to replace. Print the sheet again and cut out only the piece you need.
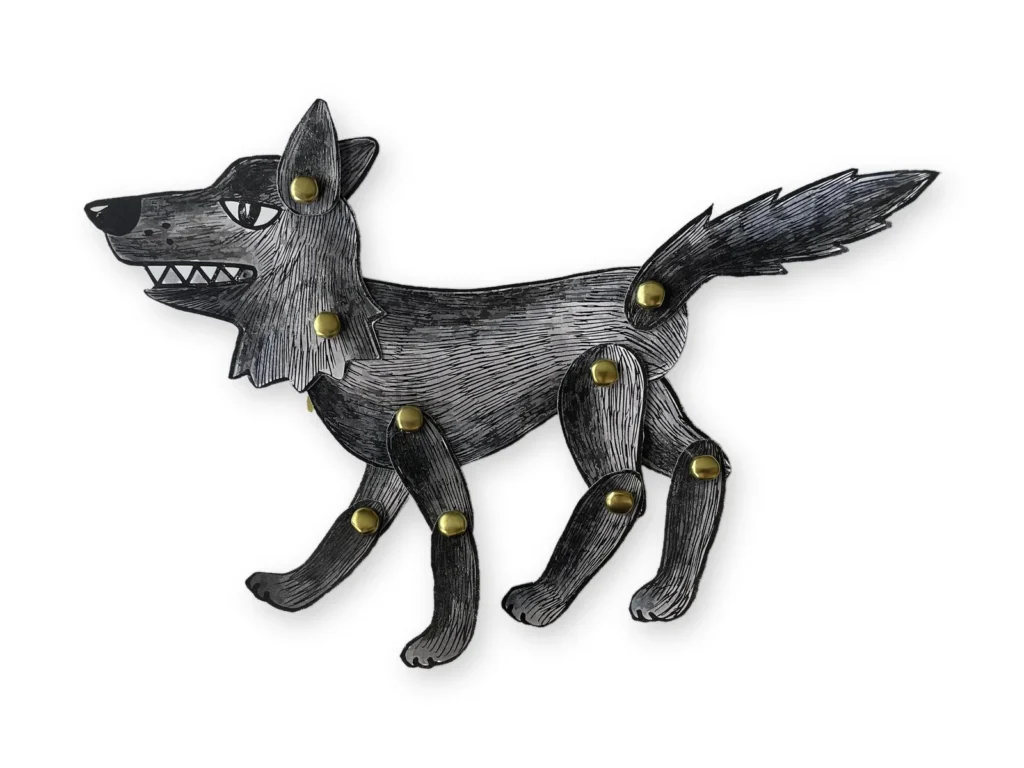
Try it on the free wolf
The Big Bad Wolf puppet printable is free with a DiNerija account and has 9 paper doll joints to practise on. For the full build with photos of every step, read How to Make a Paper Puppet with Brads. New to jointed dolls? Start with How to Make an Articulated Paper Doll, then see all our articulated paper dolls, hand-drawn and hand-coloured.
More about brads themselves and why the prongs differ in length is in the Wikipedia article on the brass fastener.